GitHub Actions: Understanding the Push and Pull Request Triggers

Introduction
In our previous article, “Understanding GitHub Actions”, we built our first workflow - a “Hello World” automation that ran every time we pushed code. It used a simple on: [push] trigger that responded to every push, to any branch, for any file change.
That was a great foundation. Now we’re ready to make it intelligent.
Imagine workflows that understand context - running tests only when code changes, triggering deployments only when production branches update, applying quality checks only when pull requests target critical branches. This is automation that knows when to act and when to stay quiet.
Today, you’ll learn precise triggers - the tools that transform basic automation into intelligent systems. You’ll gain control over exactly when workflows run based on which branches are updated and which files change.
By the end of this article, you’ll know how to:
- Work with the
pushevent: Control which branches and files trigger your workflows - Use
pull_requesttriggers: Automate code review processes intelligently - Combine filters strategically: Create sophisticated conditions for maximum efficiency
Let’s start with the foundation: the push event and how to add branch and path filters.
About This Series
This is Part 4 of a series on GitHub Actions. We’re taking a building-block approach - starting with Git fundamentals, then GitHub collaboration, now automation.
We’re introducing automation concepts gradually. First, understanding what GitHub Actions is and how it works. Then triggers and events. Then building increasingly sophisticated workflows.
In this series:
- Understanding Git: The Foundation for GitHub Actions - Version control fundamentals
- Setting Up Your First GitHub Repository - Moving code to the cloud
- GitHub Pull Requests: How to Propose, Review, and Merge Changes Safely - Safe integration workflow
- Understanding GitHub Actions: Core Concepts and Fundamentals - Your first automation
- Understanding Push and Pull Request Triggers ← You are here
- And more as we build toward production-ready automation…
Each article stands alone, but they build on each other. Start from the beginning if you’re new to Git and GitHub, or jump straight to automation if you’re ready.
The Push Event: Your First Trigger
Your Hello World workflow runs every time you push code - exactly as we designed it:
name: Hello World
on: [push]  # Runs on every push to any branch
This works great for simple projects. But as we learned in our article about pull requests, real development happens across multiple branches. When you’re experimenting on a feature branch and pushing frequently, you might not need the workflow to run each time.
Let’s add control over which branches trigger your workflow.
Controlling Workflow Execution with Branches
The branches and branches-ignore keywords give you precise control over when workflows run.
The branches Keyword: Your Include List
With branches, you tell GitHub Actions exactly which branches should trigger your workflow:
on:
  push:
    branches:
      - main
      - develop
      - 'release/**'
Let’s look at how this works. When you list a specific branch name like main or develop, the workflow runs when you push to a branch with that exact name. So main means “run this workflow when I push to the main branch.”
But what if you have multiple release branches like release/1.0, release/2.3.4, and release/summer-update? Instead of listing each one individually, you can use a wildcard pattern. The 'release/**' pattern tells GitHub: “run this workflow on any branch that starts with release/”:
- ✅
release/1.0 - ✅
release/2.3.4 - ✅
release/2024/summer-update
With this configuration, your workflow runs when you push to main, when you push to develop, or when you push to any branch starting with release/.
The branches-ignore Keyword: Your Exclude List
Sometimes it’s easier to define which branches you don’t want. The branches-ignore keyword specifies branches that GitHub should not run a workflow on when updates are pushed to them:
on:
  push:
    branches-ignore:
      - 'feature/**'
      - 'experiment/**'
With this configuration, your workflow runs on every branch except those starting with feature/ or experiment/. So your main branch triggers it, your hotfix branches trigger it, but your experimental work doesn’t.
Combining Both Filters
GitHub Actions gives you even more sophisticated control - you can combine both keywords to target exactly the branches where you want your workflow to run while excluding exactly the branches where you don’t.
Let’s say you want your workflow to run on main and any release branch, but you’re not ready for it to run on alpha or beta releases:
on:
  push:
    branches:
      - main
      - 'release/**'
    branches-ignore:
      - 'release/**-alpha'
      - 'release/**-beta'
Here’s how this behaves:
- Push to
main→ ✅ Workflow runs - Push to
release/1.0→ ✅ Workflow runs - Push to
release/2.0-alpha→ ❌ Workflow skipped - Push to
release/3.0-beta→ ❌ Workflow skipped
With this combination, your workflow can now distinguish between production-ready releases and experimental ones.
Controlling Workflow Execution with File Paths
Let’s say you want your workflow to run only when your application code changes - files like src/app.js or package.json - but not when you update documentation or README files. Even if both types of changes are pushed to your main branch, you only want the workflow to trigger for the code that actually affects your application.
GitHub Actions gives you this control through path filters.
The paths Keyword: Specify Which Files Matter
With paths, you tell GitHub Actions which file changes should trigger your workflow:
on:
  push:
    paths:
      - 'src/app.js'        # This specific file
      - 'src/**'            # Anything in the src directory
      - '**/*.js'           # Any JavaScript file, anywhere
      - 'package.json'      # Your dependencies file
Here’s how this works: if any file matching any of these patterns changes in your commit, the workflow triggers. When you push changes that include src/app.js, the workflow runs. When you push changes to package.json, the workflow runs. When you push changes to both, the workflow still runs once.
You can use wildcard patterns just like with branches:
src/**/*.js- Any JavaScript file within the src directory (even deeply nested)**/*.test.js- All test files across your entire repositorydocs/**- Any file in the docs directory
The paths-ignore Keyword: Specify Which Files to Skip
The paths-ignore keyword tells GitHub Actions which file changes should not trigger your workflow:
on:
  push:
    paths-ignore:
      - '**/*.md'           # All markdown files
      - 'docs/**'           # The entire docs directory
      - '**/*.txt'          # Text files
      - '.gitignore'        # Gitignore changes
With this configuration, your workflow runs when you push changes to any file except those matching these patterns. Push a change to your source code? The workflow runs. Push a change to README.md? The workflow skips.
Combining Path Filters
You can combine both keywords for more control. Here’s an example: you want your workflow to watch the src directory, but not when you’re only updating test files:
on:
  push:
    paths:
      - 'src/**'            # Watch the src directory...
    paths-ignore:
      - 'src/**/*.test.js'  # ...but skip test files within it
      - 'src/**/*.spec.js'  # ...and spec files too
Now here’s how it behaves:
- Push changes to
src/app.js→ ✅ Workflow runs - Push changes to
src/utils/helper.js→ ✅ Workflow runs - Push changes to
src/app.test.js→ ❌ Workflow skipped - Push changes to
src/utils/helper.spec.js→ ❌ Workflow skipped
Your workflow now responds to production code changes in the src directory while ignoring test updates.
Combining Branches and Paths
GitHub Actions allows you to combine branch filters and path filters for precise control over when your workflow runs:
on:
  push:
    branches:
      - main
      - 'release/**'
    paths:
      - 'src/**'
      - 'package*.json'
    paths-ignore:
      - '**/*.test.js'
This workflow runs when all these conditions are met:
- You push to
mainor areleasebranch, AND - You change files in the source directory or dependencies, AND
- You’re not just changing test files
Your workflow now understands context - it knows which branches matter and which files matter.
Let’s Practice: Putting It All Together
Let’s modify our Hello World workflow to use both branch and path filters. We’ll make it run only when JavaScript files change on the main branch.
Step 1: Open your workflow
Open your repository in VS Code and navigate to .github/workflows/main.yml. Update it to:
name: Hello World
on:
  push:
    branches:
      - main
    paths:
      - '**/*.js'
jobs:
  say-hello:
    runs-on: ubuntu-latest
    steps:
      - name: Say hello
        run: echo "Hello, GitHub Actions!"
      - name: Tell us the time
        run: date
Step 2: Create a test file
Create a new JavaScript file called test.js in your repository:
// test.js
console.log("Testing path filters!");
Step 3: Push your changes
Stage, commit, and push to GitHub:
git add .
git commit -m "Add path filters to workflow and test JS file"
git push
Head to the Actions tab in your GitHub repository. You’ll see your workflow running:
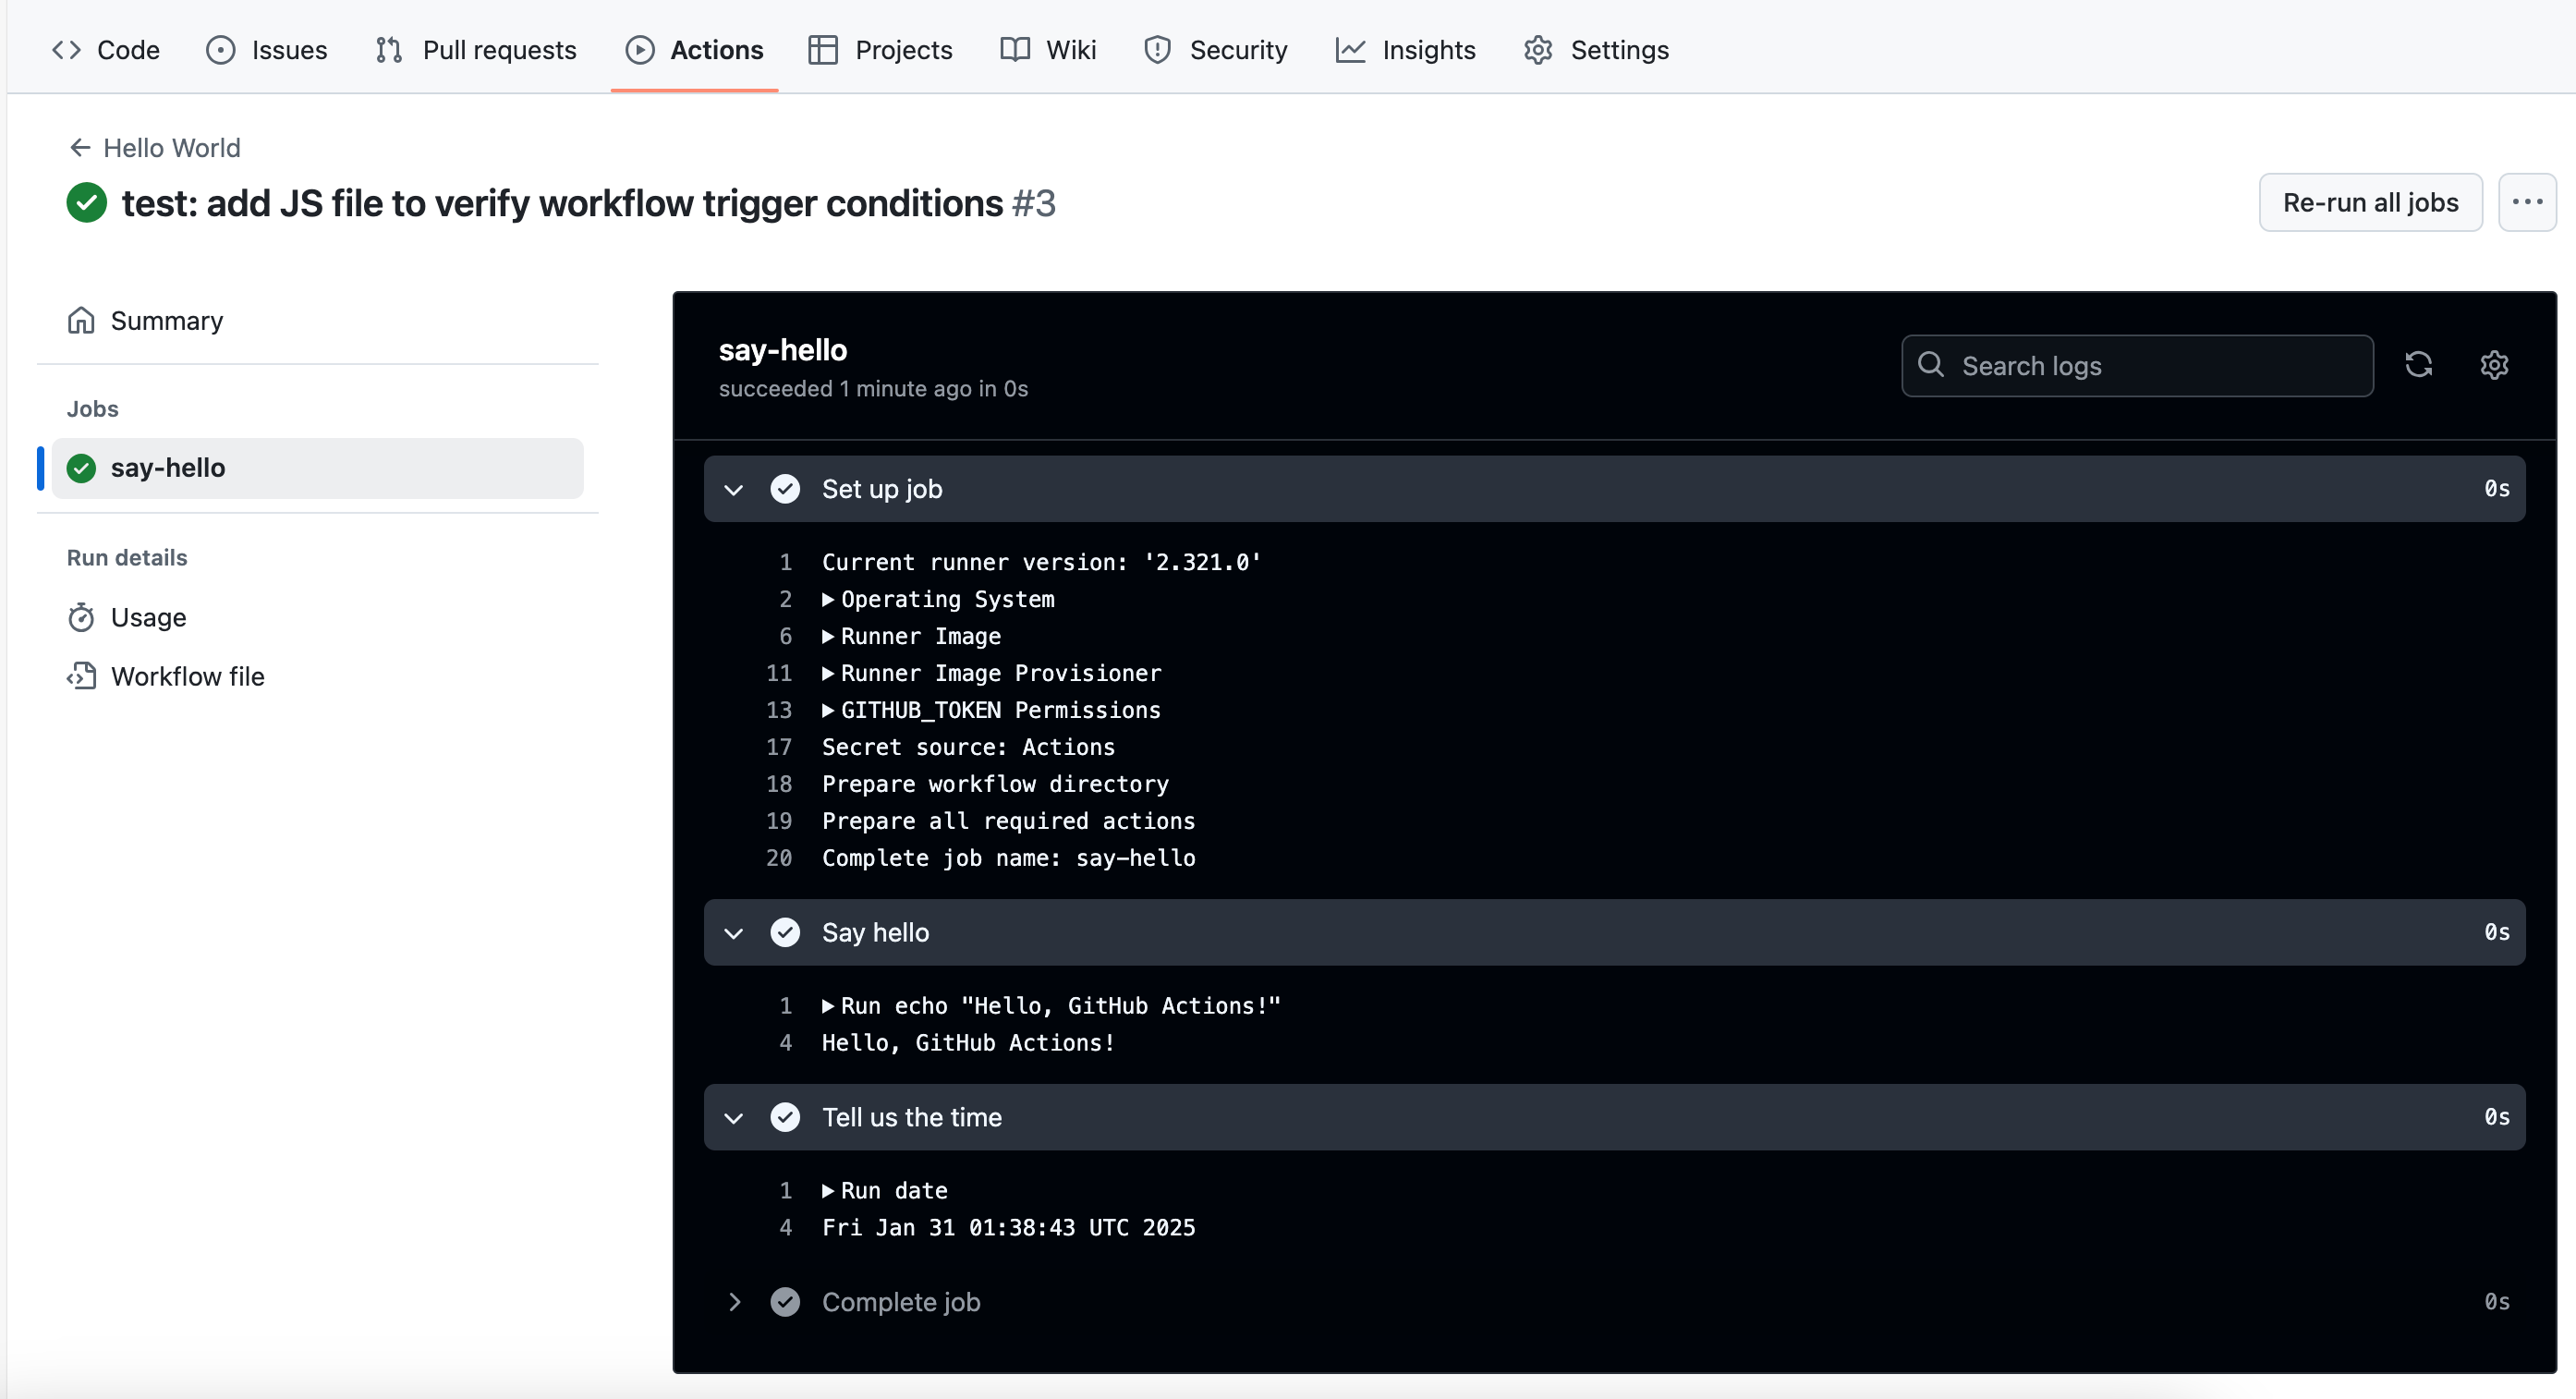
Step 4: Test with a non-JavaScript file
Now let’s verify the path filter works. Update your README.md file with any change, then push:
git add README.md
git commit -m "Update README"
git push
Check the Actions tab. You’ll notice your workflow didn’t run. Your filters are working - the workflow only runs for JavaScript files on the main branch.
You’ve now learned how to control when your workflows run using both branch and path filters. Your push event workflows can now respond intelligently to different types of changes.
But what if you want automation to run when someone opens a pull request? When a team member proposes changes and opens a pull request for review, you might want to run checks automatically. That’s where the pull_request event comes in. Let’s explore that next.
The pull_request Event: Automating Code Reviews
You’ve learned how to control workflows with push events. Now let’s look at pull request events, which give you even more control through different event types.
Understanding pull_request Event Types
When you use the pull request trigger, you can specify which pull request activities should trigger your workflow:
on:
  pull_request:
    types: [opened, reopened, synchronize]
If you don’t specify types, GitHub Actions uses these three by default:
opened: When someone creates a new pull requestreopened: When a closed pull request is reopenedsynchronize: When someone pushes new commits to the pull request branch
You can also trigger on other activities:
on:
  pull_request:
    types: [opened, closed, labeled, assigned, edited]
Each type lets you automate different aspects of your code review process - running checks when PRs open, triggering cleanup when they close, or assigning reviewers when labels are added.
The Critical Difference: Target Branch Filtering
Here’s where pull requests differ significantly from push events. For pull requests, the branches and branches-ignore filters apply to the target branch (also called the base branch) - where the changes are going - not where they’re coming from.
on:
  pull_request:
    branches:
      - main
      - 'release/**'
This workflow runs when:
- ✅ A pull request targets
main(trying to merge INTO main) - ✅ A pull request targets
release/1.0(trying to merge INTO a release branch) - ❌ A pull request from
maintodevelop(main is the source, not the target)
The filter asks: “Where is this pull request trying to put its changes?” not “Where did these changes come from?”
This makes sense when you think about it - you want strict checks on pull requests targeting production branches, regardless of where the changes originated.
Path Filters for Pull Requests
Path filters work the same way for pull requests as they do for push events:
on:
  pull_request:
    paths:
      - 'src/**'
      - '**/*.js'
    paths-ignore:
      - '**/*.md'
      - 'docs/**'
The filters look at which files were changed in the pull request. If someone’s pull request only updates documentation, you can skip running the test suite.
Combining Filters for Pull Requests
Just like with push events, you can combine branch and path filters:
on:
  pull_request:
    branches:
      - main
      - production
    paths:
      - 'src/**'
      - 'package*.json'
    types: [opened, synchronize, reopened]
This workflow runs when:
- A pull request targets
mainorproduction, AND - The pull request changes source code or dependencies, AND
- The pull request is opened, updated with new commits, or reopened
Your workflow now applies strict checks only to pull requests that target critical branches and modify important code.
Let’s Practice: Pull Request Triggers
Let’s create a workflow that demonstrates pull request triggers and their key differences from push events.
Step 1: Create a new workflow
In your repository, create a new file .github/workflows/pr-check.yml:
name: PR Filter Demo
on:
  pull_request:
    branches:
      - main
    paths:
      - 'src/**/*.js'

jobs:
  check-pr:
    runs-on: ubuntu-latest
    steps:
      - name: Check PR details
        run: |
          echo "This workflow ran because:"
          echo "1. A pull request is targeting main"
          echo "2. JavaScript files in src/ were modified"
Step 2: Create a feature branch
Create a new branch and add some files:
git checkout -b test-pr-filters
mkdir src
echo 'console.log("Testing PR filters!");' > src/test.js
git add .
git commit -m "Add src directory and test file"
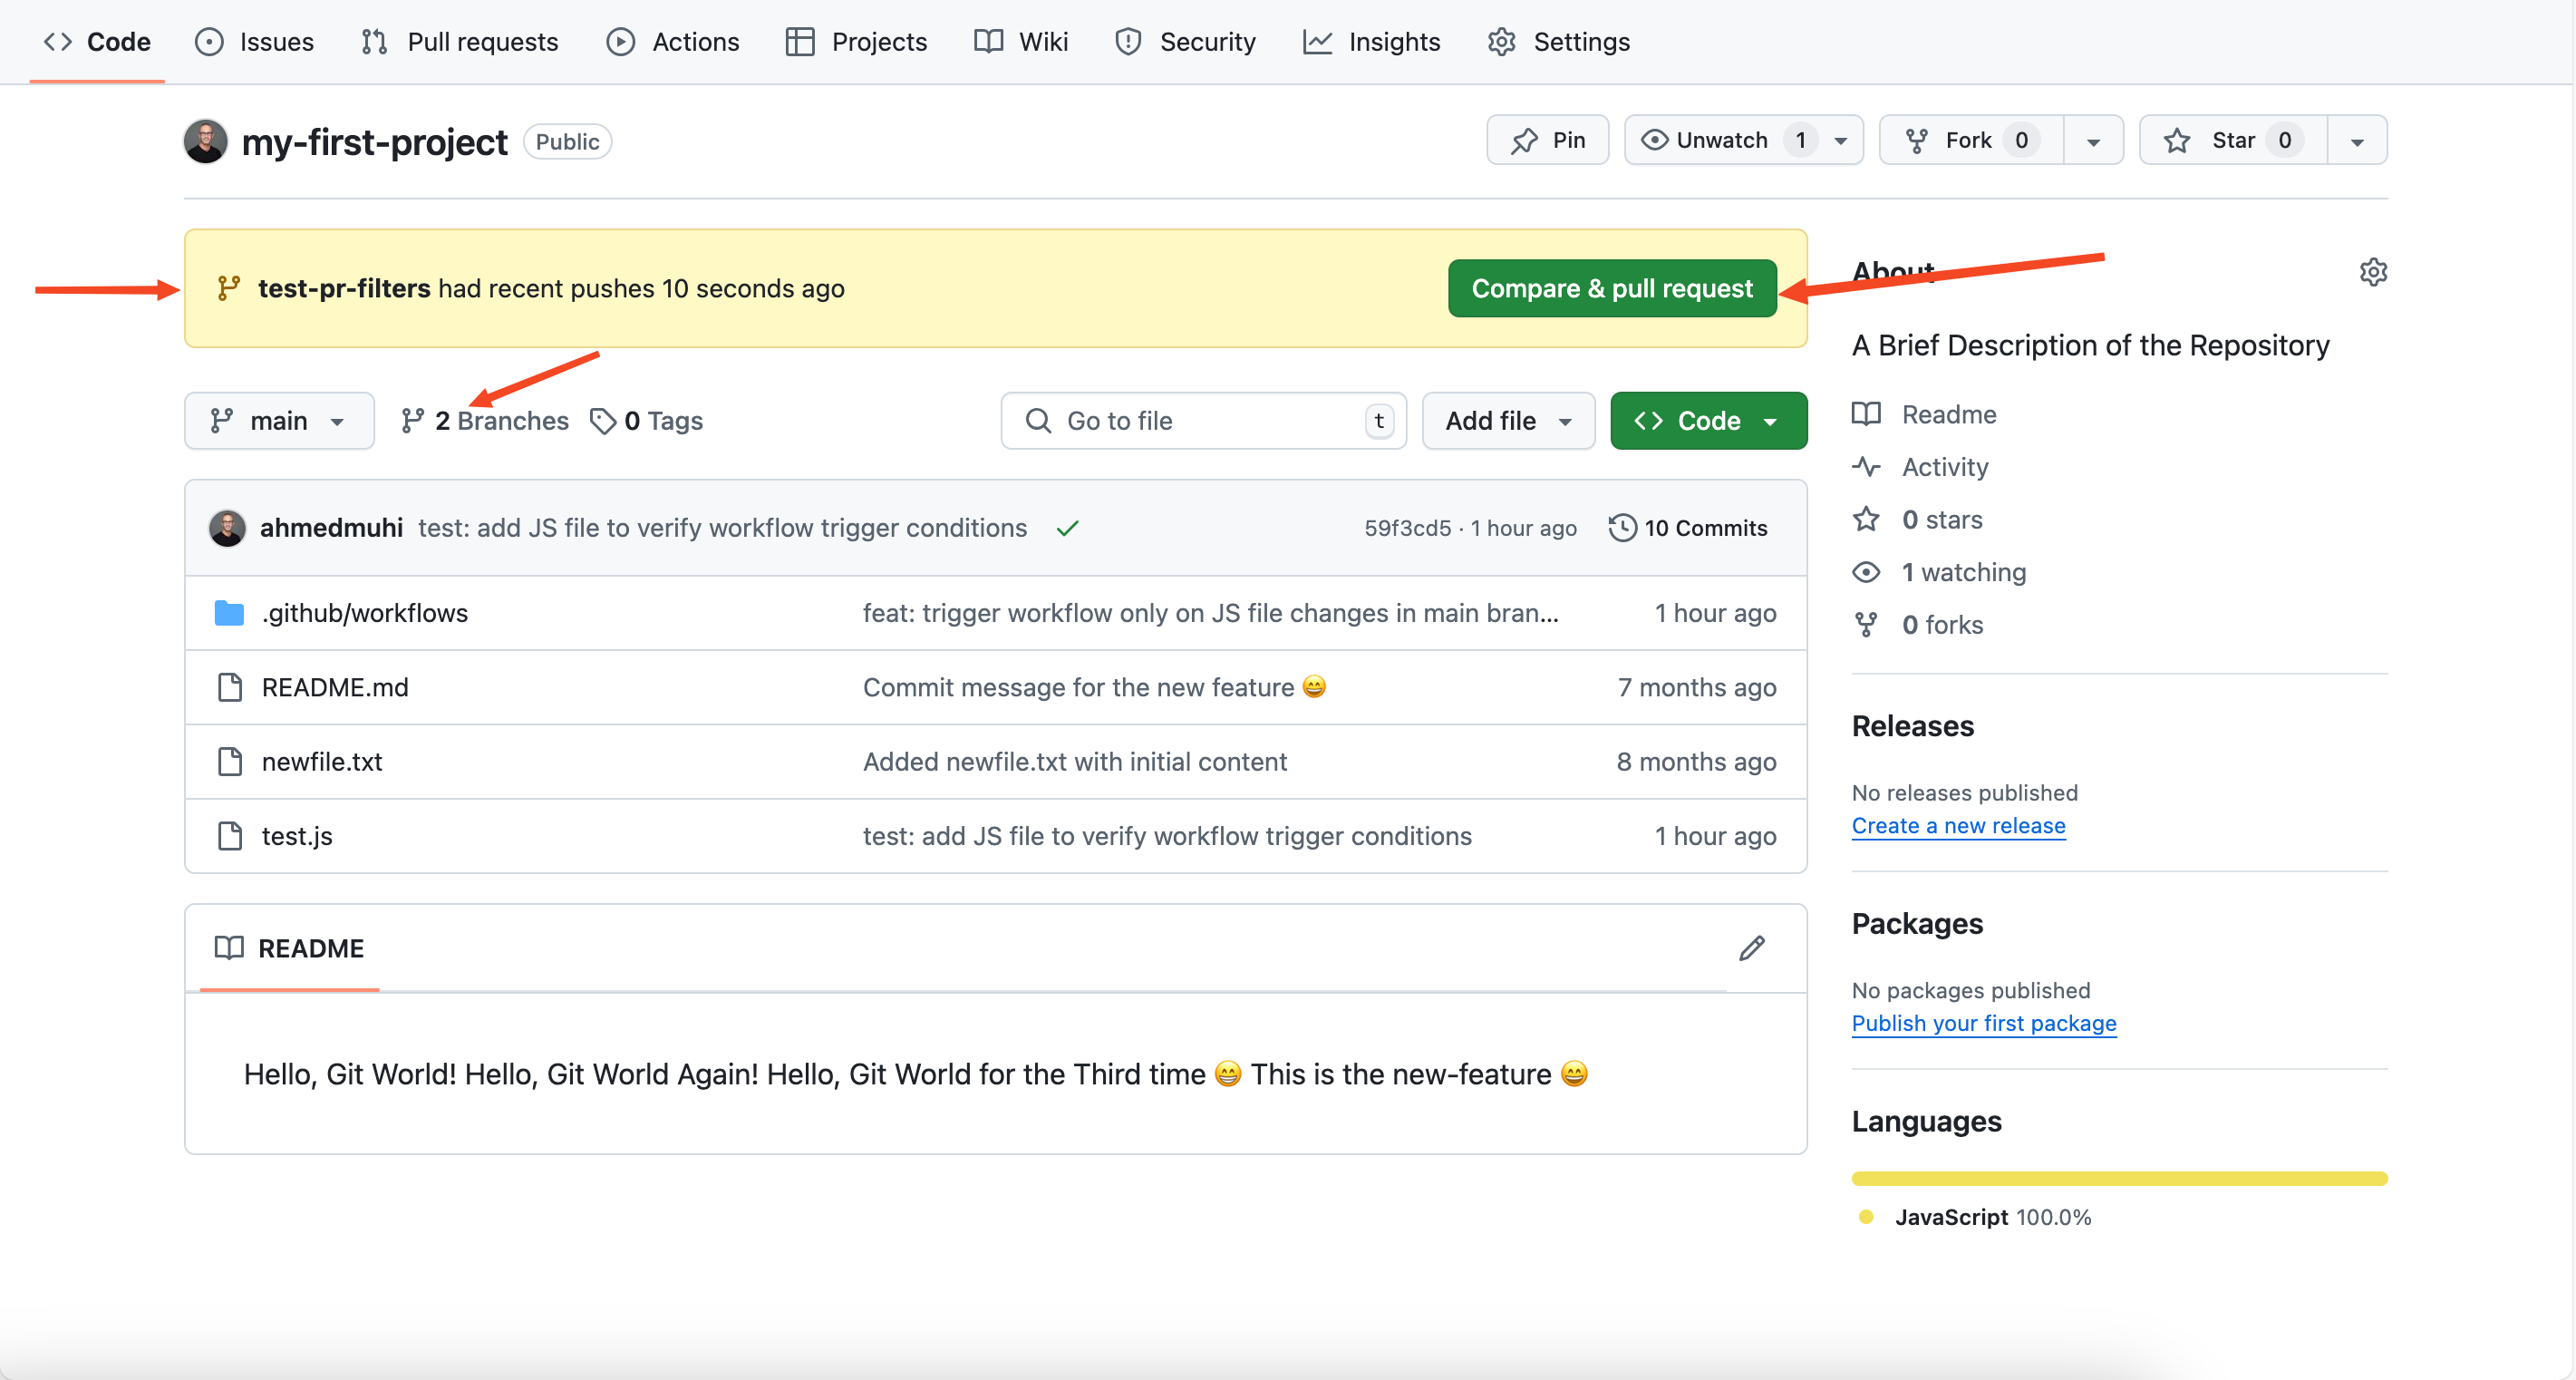
git push -u origin test-pr-filtersStep 3: Open a pull request
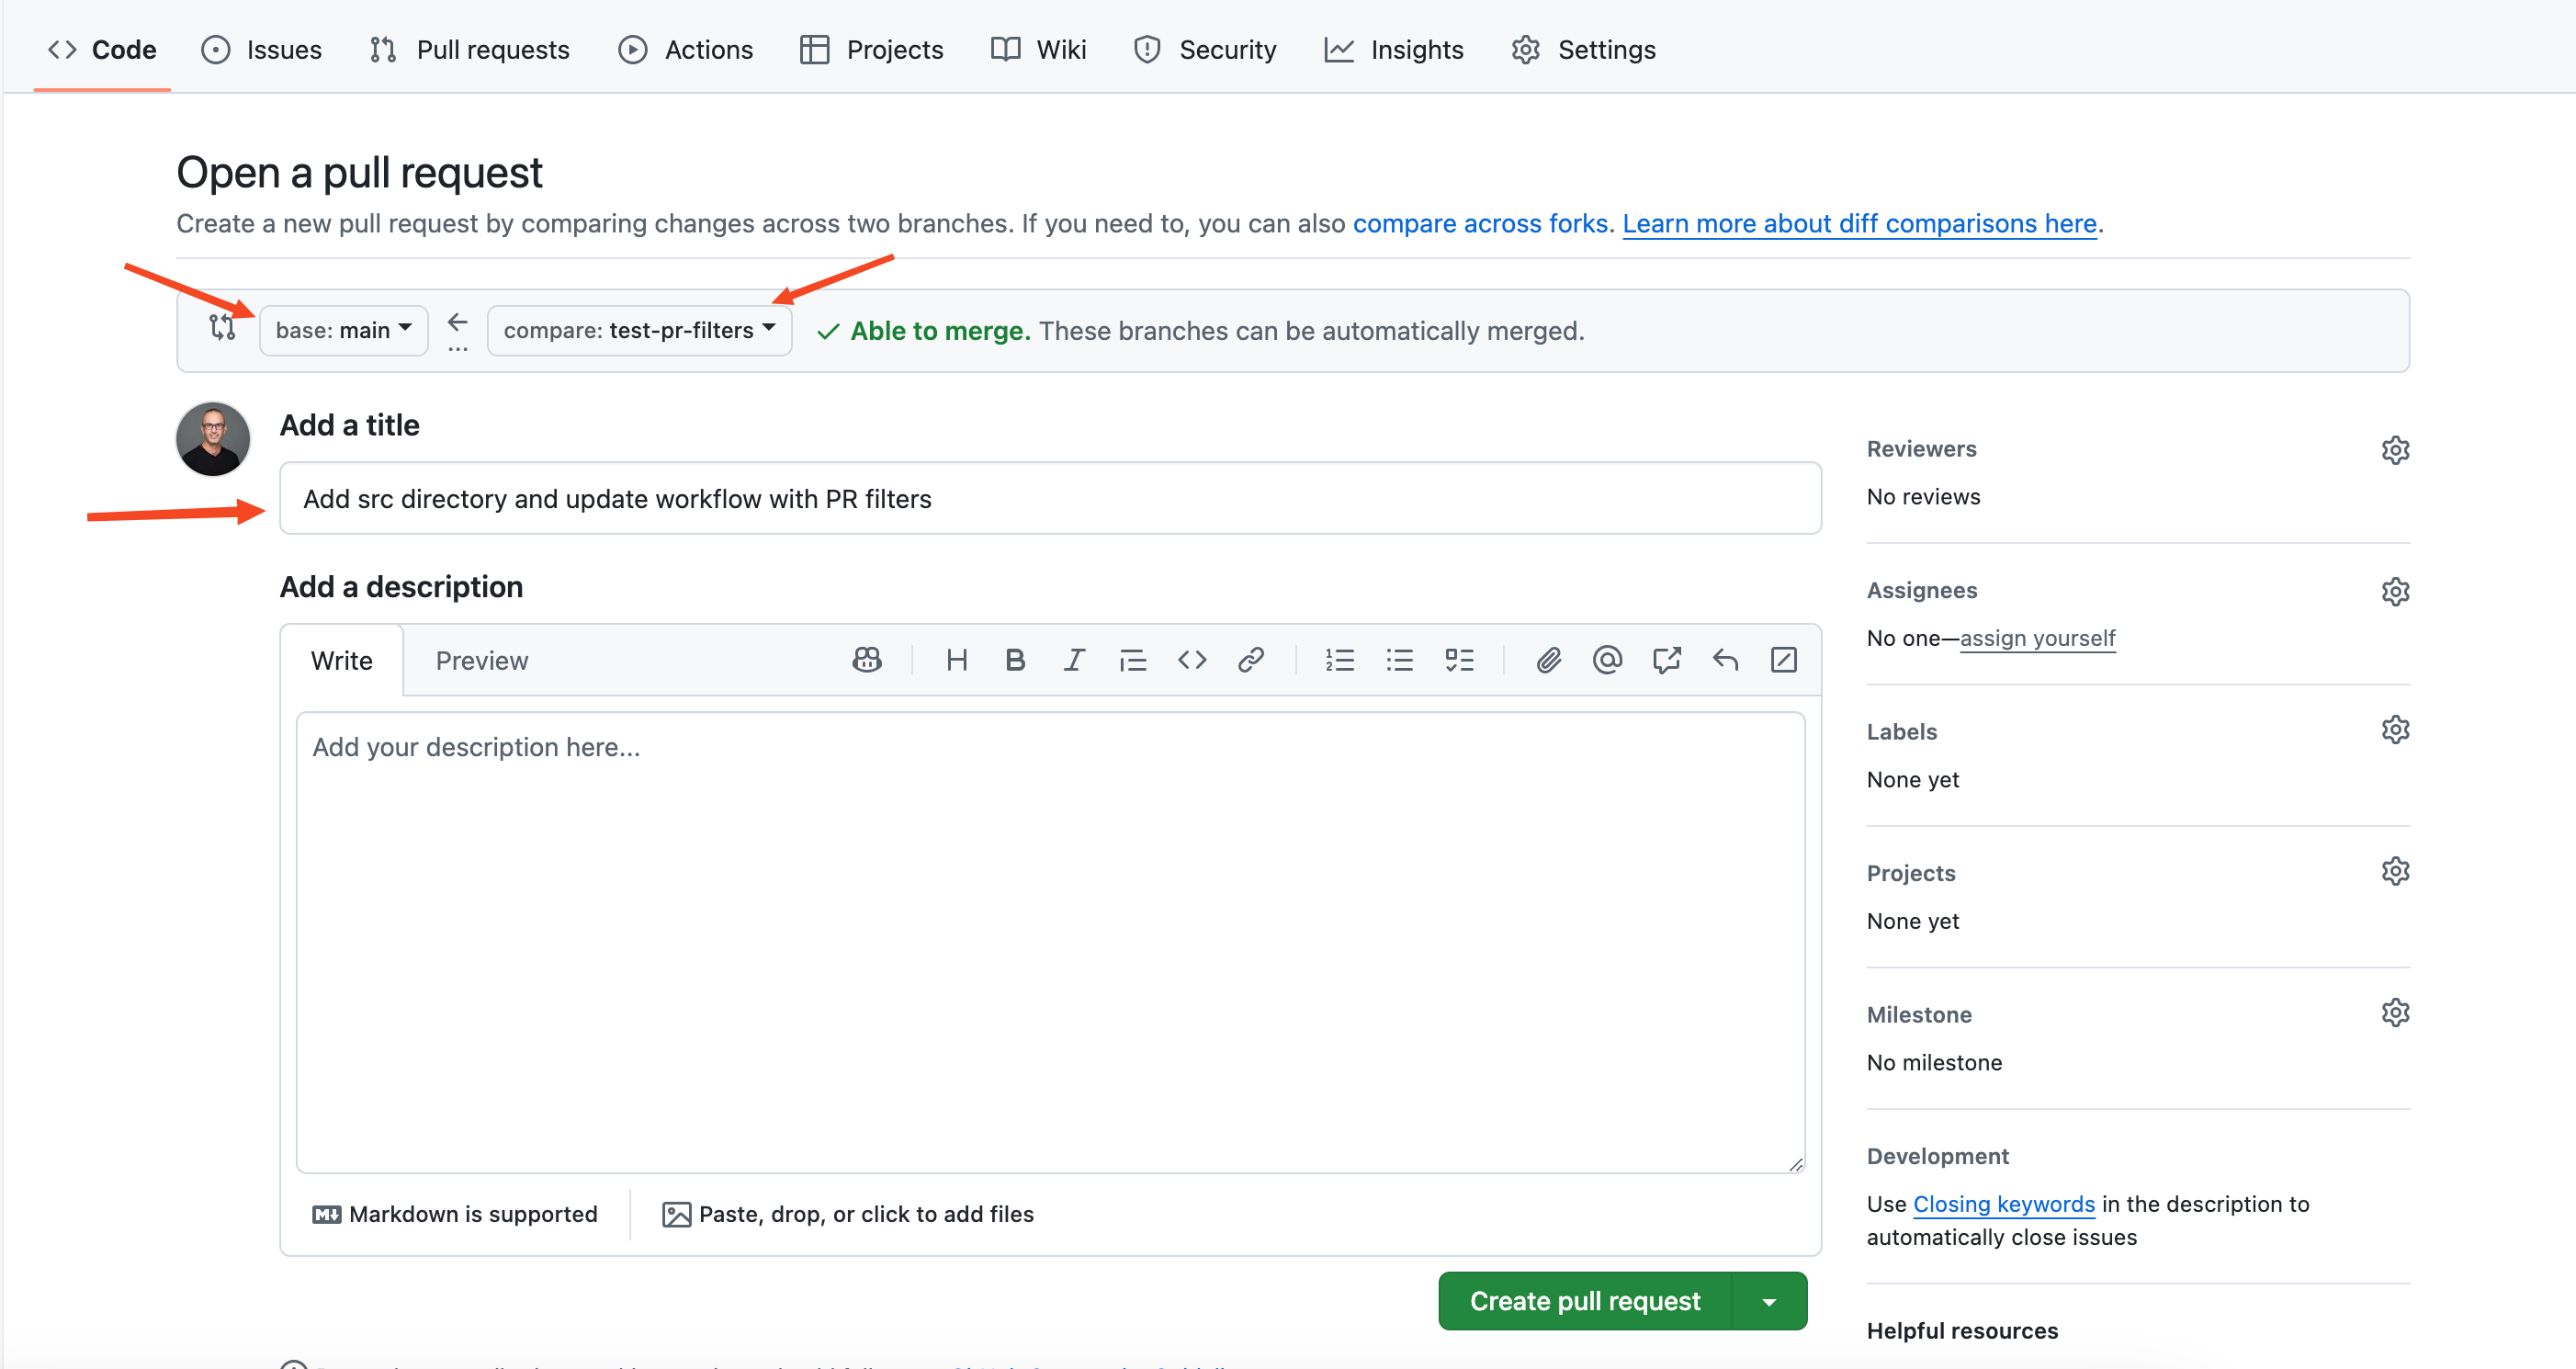
Head to your repository on GitHub. You’ll see a banner with a “Compare & pull request” button:
Click it to create your pull request. Make sure the base branch is main:
Step 4: Watch the workflow run
Once you create the pull request, navigate to the Actions tab. You’ll see your workflow running:
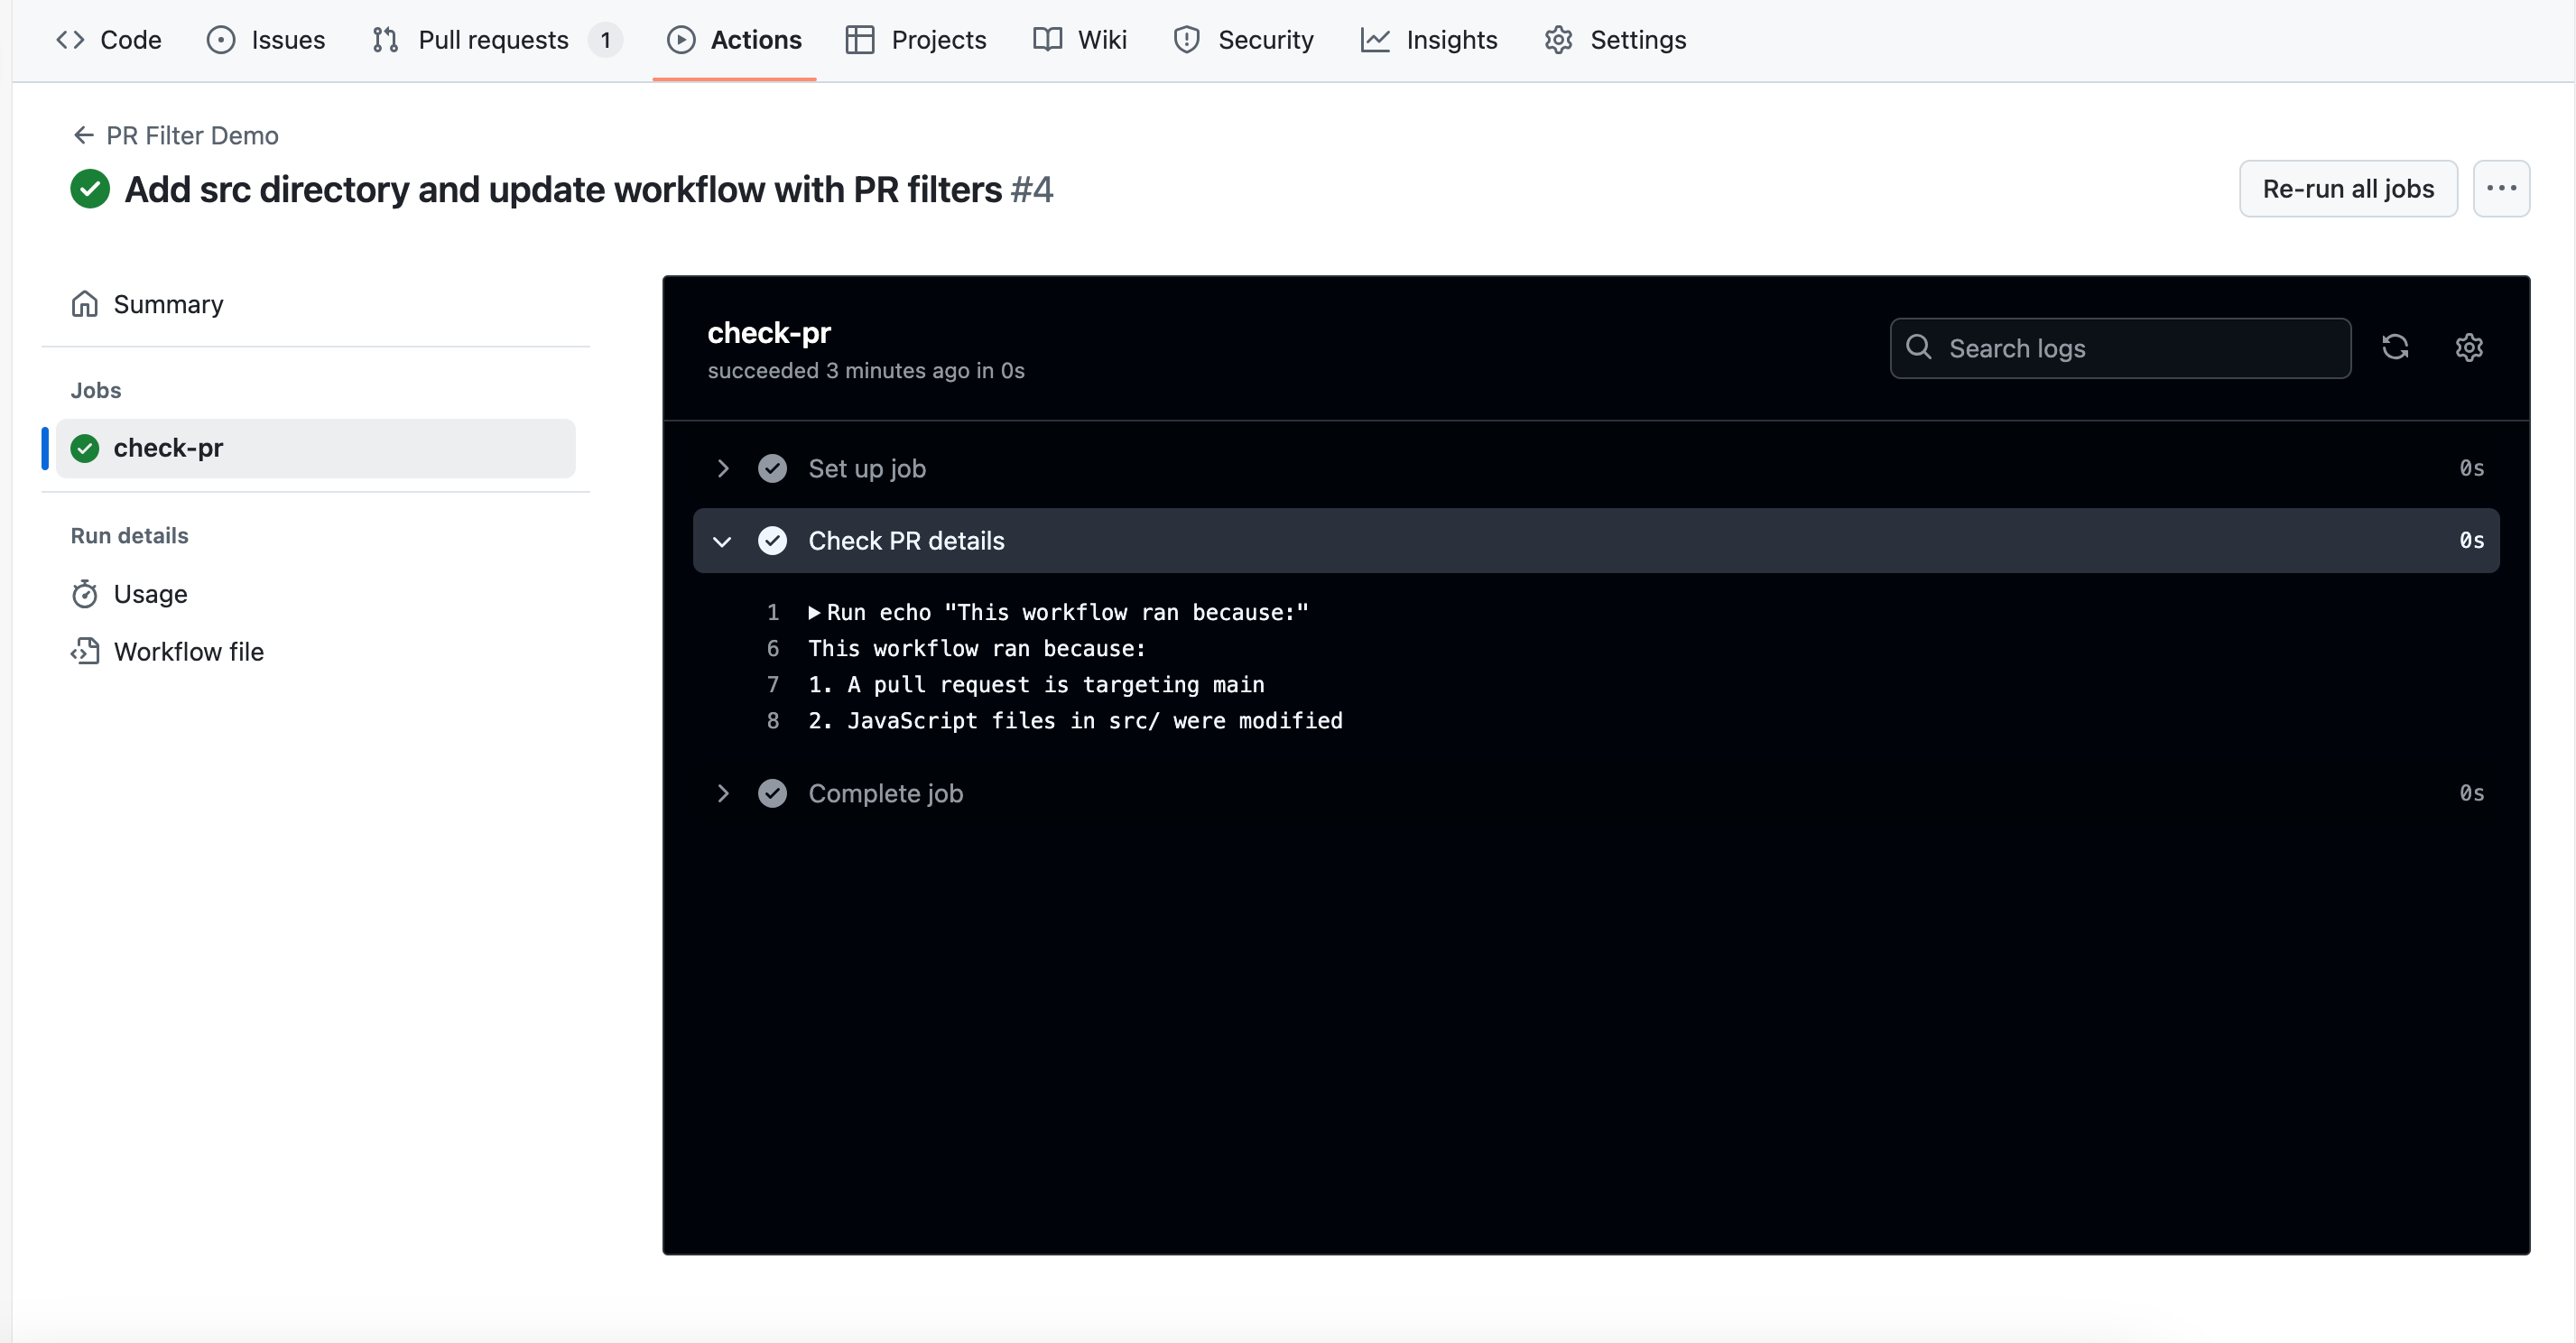
Notice that the workflow ran before you merged the pull request. This is intentional - you want your checks to run and verify everything works before the code gets merged into your main branch.
Step 5: Merge and clean up
Since we’re just learning here and the workflow passed, go ahead and merge your pull request. Click “Merge pull request” and then “Delete branch” to keep your repository clean.
You now understand how pull request triggers work and how they differ from push events. The key difference - filtering on the target branch rather than the source - gives you precise control over when your workflows run.
Wrap Up
You’ve learned how to control when your GitHub Actions workflows run using both push and pull_request triggers. You can now:
- Control which branches trigger your workflows using
branchesandbranches-ignore - Control which file changes trigger your workflows using
pathsandpaths-ignore - Combine filters for precise control
- Understand the critical difference between push and pull request events - especially how pull request filters apply to the target branch
Your workflows now respond intelligently to the changes that matter, saving compute resources and providing feedback exactly when needed.
What’s Next
In our next article, we’ll explore even more ways to trigger workflows:
- Scheduled triggers: Run workflows at specific times (like nightly builds or weekly reports)
- Manual triggers: Trigger workflows on-demand with
workflow_dispatch - Other event types: Discover additional GitHub events that can power your automation
The triggers we covered today - push and pull_request - are the foundation of most CI/CD pipelines. But GitHub Actions offers much more flexibility, and we’re just getting started.
See you in the next article!