Understanding Kubernetes ReplicaSets: Ensuring High Availability for Your Applications

Introduction
The previous article ended on an honest admission. A pod is the smallest unit Kubernetes schedules, but on its own, it is fragile.
A pod can run your application, but it does not protect it. If the pod disappears, something else needs to notice. If the node underneath it is no longer available, the pod goes with it. If you want three copies of the same application running, you should not have to create and manage three separate pods by hand.
That is the gap ReplicaSet fills.
A ReplicaSet lets you stop thinking in terms of individual pods and start thinking in terms of the state you want. Instead of saying, “run this pod,” you say, “keep three copies of this pod running.” Kubernetes then keeps working to make that true.
If one of those pods disappears, the ReplicaSet creates another. If you change the number from three to five, it creates two more. If you change it back down, it removes the extra pods. Different situations, same behaviour: compare what should exist with what actually exists, then close the gap.
That idea should feel familiar. It is the same reconciliation pattern we introduced in Part 1. Kubernetes works from the desired state you give it, compares that with the current state of the cluster, and takes action when the two do not match.
In this article, we will see that pattern in action. We will write a ReplicaSet in YAML, apply it to a cluster, and watch it replace a deleted pod in real time. By the end, the shift should feel obvious: in Kubernetes, you almost never want to manage pods directly. You want something managing them for you.
What a ReplicaSet Does
A pod is not meant to be treated like a permanent machine.
This is one of the first important shifts in Kubernetes. If you come from a virtual machine background, you might be used to thinking about servers as things with long lives. You create a VM, give it a name, connect to it, patch it, monitor it, and expect it to stay there.
Pods are different.
A pod is a running copy of your application, but it is not something Kubernetes expects to keep forever. A pod might disappear because the node it was running on failed. It might be replaced because you rolled out a newer version of the application. It might be moved because the cluster needs to make better use of the nodes it has.
So the pod matters, but not as a permanent thing. What matters more is the job it was doing. If one pod was serving your frontend, and that pod is gone, you do not need that exact pod back. You need another pod that can do the same job.
That is where ReplicaSet comes in.
A ReplicaSet lets you describe the kind of pod you want Kubernetes to keep running. It might be one pod. It might be three. It might be ten. The number can change, but the idea is the same: keep this many pods like this running.
You are no longer managing one pod at a time. You are describing the state you want Kubernetes to maintain.
For example, you might say:
“Keep three frontend pods running.”
From that point on, the ReplicaSet keeps comparing that request with what is actually running. If the numbers match, nothing changes. If they do not match, the ReplicaSet creates or removes pods until they do.
This is the reconciliation pattern from Part 1, but here it is easier to see. The ReplicaSet has one number to protect: how many pods like this should be running.
The reason does not need to be complicated. Maybe you deleted a pod while testing. Maybe you scaled the ReplicaSet from three pods to five. Maybe a node became unavailable and the pods on it stopped serving your application. In each case, the ReplicaSet reacts in the same way. It looks at how many matching pods exist, compares that with the number you asked for, and closes the gap.
That is the whole idea. A ReplicaSet does not try to preserve individual pods. It preserves the number of pods you asked for.
That distinction matters.
With a standalone pod, you are saying, “run this pod.” With a ReplicaSet, you are saying, “make this many pods like this exist.” The individual pods can come and go, but the desired count remains.
The next question is how the ReplicaSet knows which pods count as “pods like this.” That is where labels come in, and it is the first thing we will see when we write the YAML.
A ReplicaSet in YAML
Now that the idea is clear, we need to describe it to Kubernetes.
That means writing a YAML file.
Here is a ReplicaSet that keeps three nginx pods running:
apiVersion: apps/v1
kind: ReplicaSet
metadata:
  name: frontend
  labels:
    app: frontend
spec:
  replicas: 3
  selector:
    matchLabels:
      app: frontend
  template:
    metadata:
      labels:
        app: frontend
    spec:
      containers:
        - name: nginx
          image: nginx:1.27
          ports:
            - containerPort: 80
Read it from the top, and you can see the same basic shape you saw with pods in Part 2: apiVersion, kind, metadata, and spec.
The first difference is the API version. A pod used apiVersion: v1. A ReplicaSet uses apiVersion: apps/v1, because ReplicaSets belong to the apps part of the Kubernetes API.
The second difference is the kind:
kind: ReplicaSetThat tells Kubernetes this file is not describing one pod. It is describing something that will manage pods.
The important part is the spec.
replicas: 3This is the number you want Kubernetes to maintain. In plain English, it means:
“Keep three pods like this running.”
If three matching pods exist, the ReplicaSet is happy. If fewer exist, it creates more. If too many exist, it removes the extra ones.
But that raises an important question: how does the ReplicaSet know which pods to count?
That is the job of the selector.
selector:
  matchLabels:
    app: frontend
The selector tells the ReplicaSet which pods belong to it. In this example, it is looking for pods with the label app: frontend.
This matters because a cluster can have many pods running at the same time. The ReplicaSet should not count every pod in the cluster. It should only count the pods that match its selector.
Then comes the template.
template:
  metadata:
    labels:
      app: frontend
  spec:
    containers:
      - name: nginx
        image: nginx:1.27
        ports:
          - containerPort: 80
The template is the pod recipe.
When the ReplicaSet needs to create a new pod, this is what it uses. Inside the template, you can see a normal pod definition: metadata, labels, spec, containers, image, and ports. The ReplicaSet does not invent a pod from nowhere. It creates pods from this template.
One detail is worth slowing down for: the label app: frontend.
It appears in three places.
It appears on the ReplicaSet itself:
metadata:
  labels:
    app: frontend
It appears in the selector:
selector:
  matchLabels:
    app: frontend
And it appears on the pods created from the template:
template:
  metadata:
    labels:
      app: frontend
These three labels do not all do the same job.
The label on the ReplicaSet is mostly for you. It helps you organise and find the ReplicaSet later.
The selector label is for the ReplicaSet. It says, “these are the pods I care about.”
The template label is for the pods. It makes sure every pod created by this ReplicaSet receives the label app: frontend.
The important relationship is between the selector and the template. They need to line up. The ReplicaSet looks for pods labelled app: frontend, and the pods it creates are labelled app: frontend. That is how the ReplicaSet can create a pod and then recognise that pod as one of its own.
That is the whole spec. One number says how many pods should exist. One selector says which pods count. One template says what to create when more pods are needed.
Now let’s apply it and watch it work.
Watching It Work
Save the YAML to a file called frontend-rs.yaml, then apply it to the cluster.
kubectl apply -f frontend-rs.yamlWhat happens next follows the same path we traced in Part 1. The API server receives the request, validates it, and stores the ReplicaSet in etcd. The ReplicaSet controller then sees that you asked for three pods, but none exist yet. So it creates three pods from the template. The scheduler picks nodes for them, the kubelets on those nodes start the containers, and a few seconds later the ReplicaSet has what it asked for.
Check the ReplicaSet:
kubectl get replicaset

NAME       DESIRED   CURRENT   READY   AGE
frontend   3         3         3       20s
Three desired, three current, three ready. The count matches.
Now check the pods:
kubectl get pods

NAME             READY   STATUS    RESTARTS   AGE
frontend-x4k2p   1/1     Running   0          20s
frontend-m8kl9   1/1     Running   0          20s
frontend-p9j7r   1/1     Running   0          20s
You now have three running pods. Each name begins with the ReplicaSet name and ends with a random suffix. That suffix gives each pod its own unique name.
Here is the shape of what you just created:
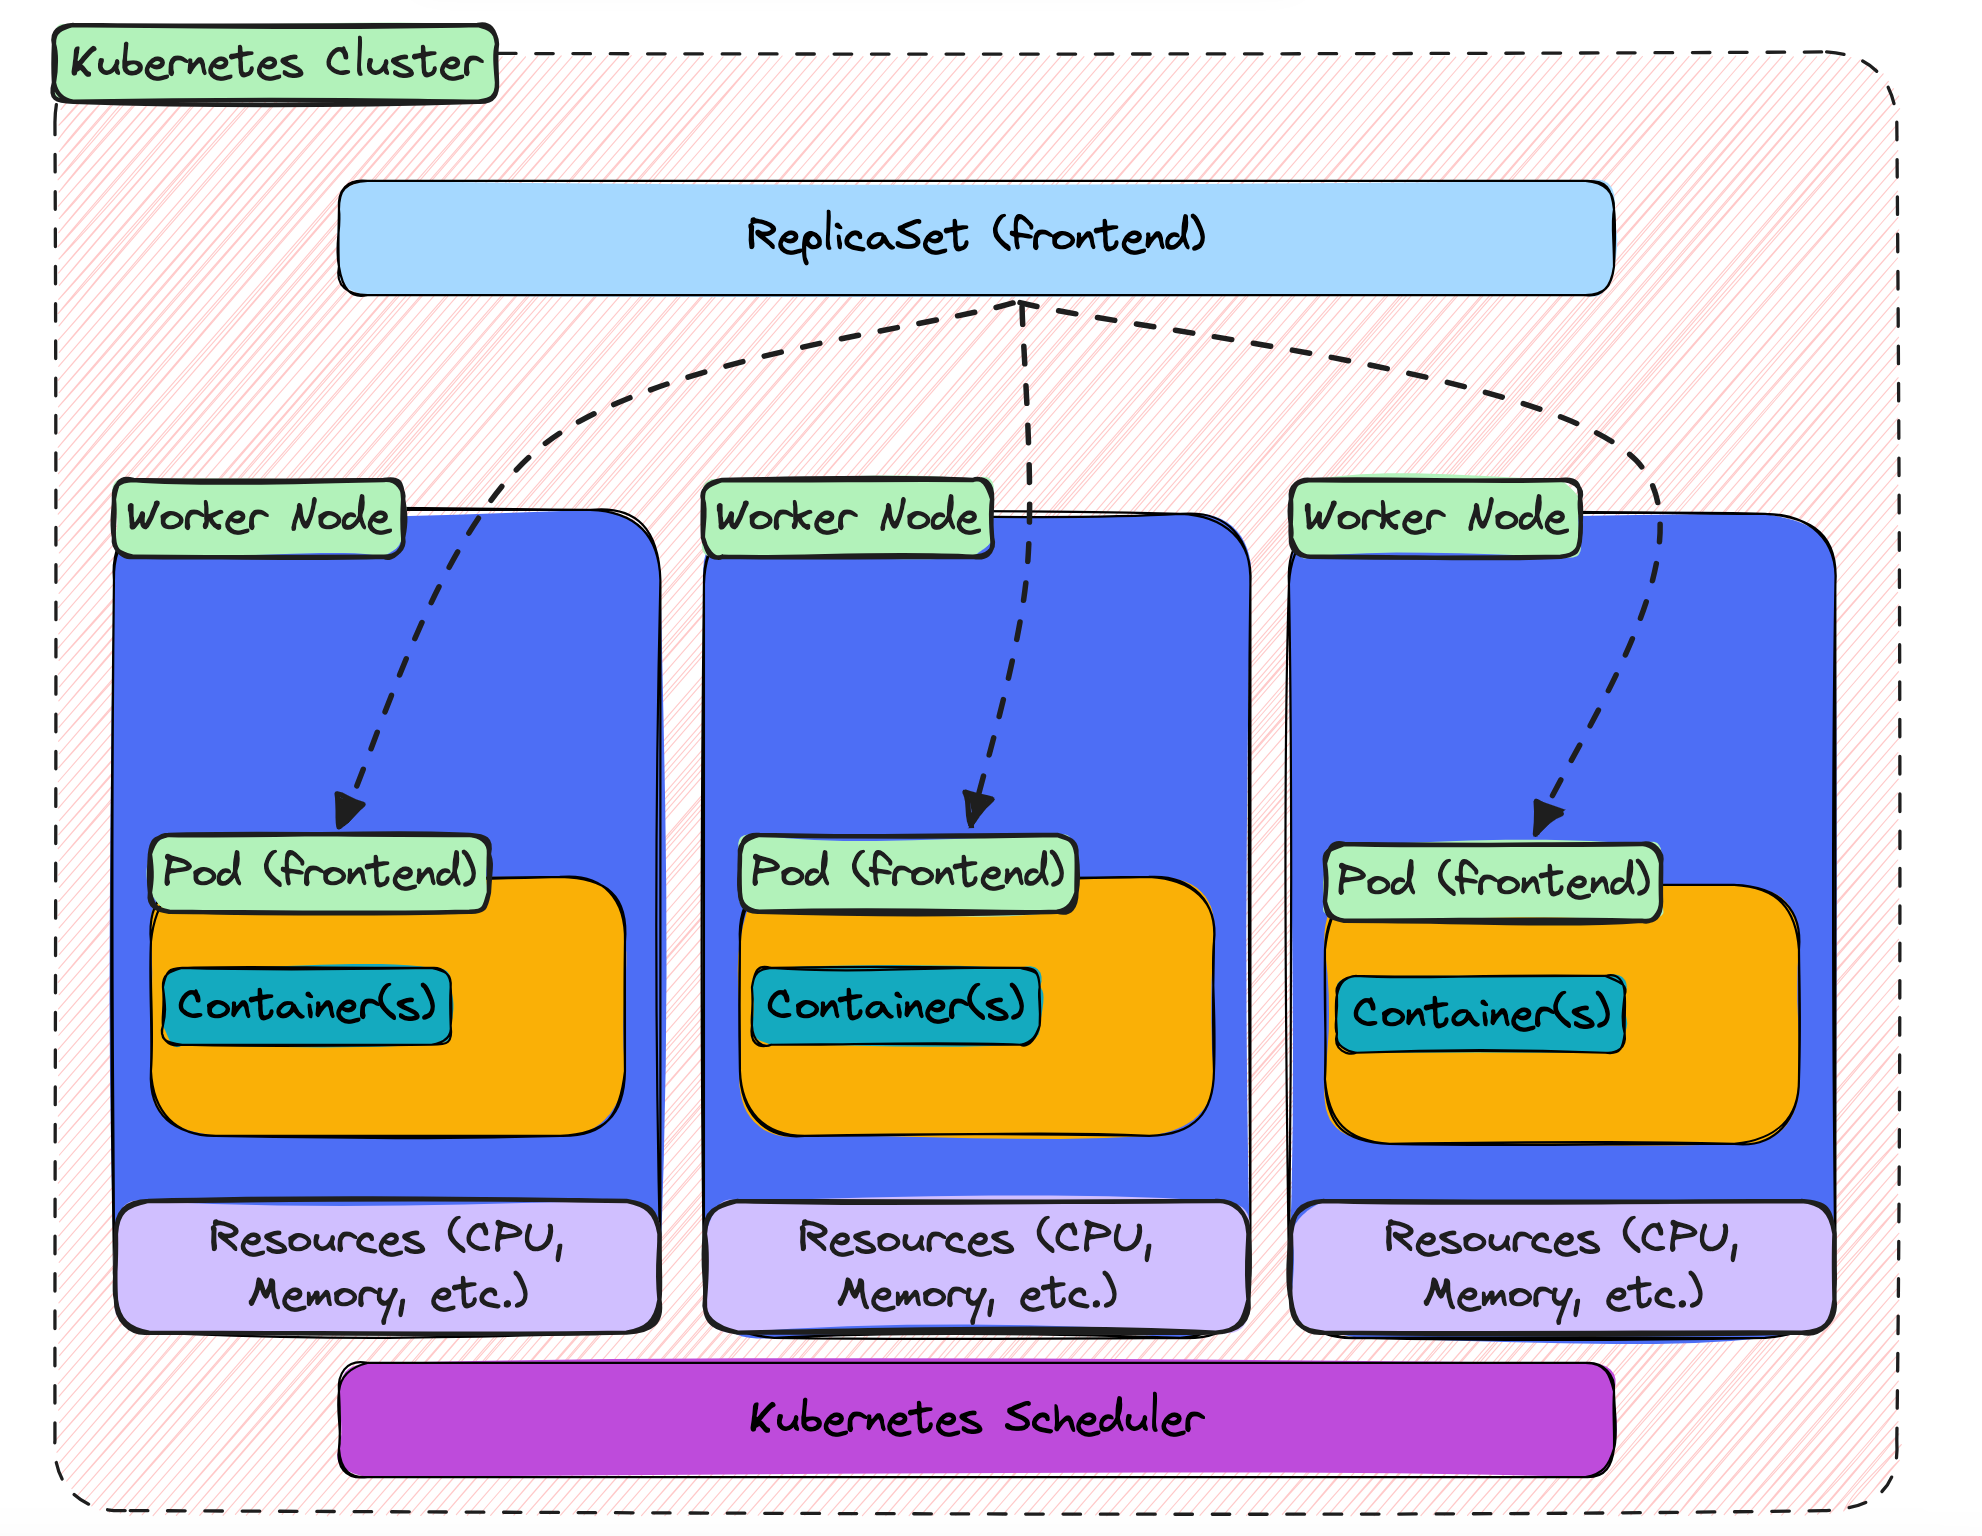
The ReplicaSet sits at the top, with the three pods underneath it. In this example, the pods ended up on different worker nodes. The dashed lines show the logical relationship: these pods belong to this ReplicaSet because their labels match its selector.
That is the starting point. Now let’s test the part that makes ReplicaSets useful.
Delete one of the pods:
kubectl delete pod frontend-x4k2pThen check the pods again:
kubectl get pods

NAME             READY   STATUS    RESTARTS   AGE
frontend-m8kl9   1/1     Running   0          1m
frontend-p9j7r   1/1     Running   0          1m
frontend-k2f9x   1/1     Running   0          4s
The pod you deleted is gone, and a new one has appeared in its place. It is only a few seconds old, but it is already running. That is the ReplicaSet doing its job. You asked for three pods, the count dropped to two, and the ReplicaSet brought it back to three.
You can change the count yourself too. If you want five pods instead of three, scale the ReplicaSet up:
kubectl scale replicaset frontend --replicas=5Check the pods again:
kubectl get pods

NAME             READY   STATUS    RESTARTS   AGE
frontend-m8kl9   1/1     Running   0          2m
frontend-p9j7r   1/1     Running   0          2m
frontend-k2f9x   1/1     Running   0          1m
frontend-j3h8r   1/1     Running   0          3s
frontend-n5k2m   1/1     Running   0          3s
Two new pods have been created. Same ReplicaSet, same template, same mechanism. The only thing that changed was the number you asked for.
Now scale it back down to three:
kubectl scale replicaset frontend --replicas=3Two of the pods will be removed, and the ReplicaSet will settle again at the new desired count.
By this point, the pattern should be clear. Whether a pod disappears or whether you change the number yourself, the ReplicaSet responds in the same way. It compares what should be running with what is actually running, then creates or removes pods until the two match.
That is the heart of it. A ReplicaSet is not watching one special pod and trying to keep that exact pod alive. It is watching the count, and making sure the right number of matching pods exists.
Where This Leads
You have now built a ReplicaSet.
It keeps the number of pods where you asked it to be. If one pod disappears, it creates another. If you scale the number up or down, it adjusts. That is already a big step beyond running a single pod by itself.
But there is still one problem left.
Look back at the pod names you saw earlier:
frontend-x4k2p
frontend-m8kl9
frontend-p9j7r
Each pod has its own name, and part of that name is random. When you deleted one pod, the replacement came back with a different name. When you scaled up, the new pods had their own new names too.
The same thing happens with IP addresses. Every pod gets an IP address when it is created, but that IP belongs to that pod for as long as that pod exists. If the pod is deleted and replaced, the old IP is gone and the new pod gets a new one.
That is fine for the ReplicaSet. The ReplicaSet does not care which exact pods are running. It only cares that the right number of matching pods exists.
But anything that wants to use those pods has a different problem.
Imagine another part of your application needs to send a request to the frontend. Which pod should it call? Which IP address should it use? Hardcoding a pod IP is not a good answer, because that pod might be replaced tomorrow, or even a few seconds from now.
So ReplicaSet solves one problem, but it reveals the next one.
You now have the right number of pods running, but you do not yet have a stable way to reach them.
That is what a Service gives you.
A Service sits in front of a group of pods and gives them a stable address. The pods behind it can change, disappear, and be replaced, but the Service stays in place. Other parts of your application talk to the Service, and the Service sends traffic to the pods that are currently available.
That is the next step in the series. ReplicaSets keep the pods alive. Services give those pods a stable way to be reached.